starting to re-tune bb for the newly reworked variators! having the belt start at the bottom of it’s travel on the front variator causes the jackshaft to spend much lower speed initially than it did before, making the motor hit crazy rpms before the hobbit clutch pulley ever engages! so i swapped out the blue dio springs in favor for stock hobbit clutch springs.
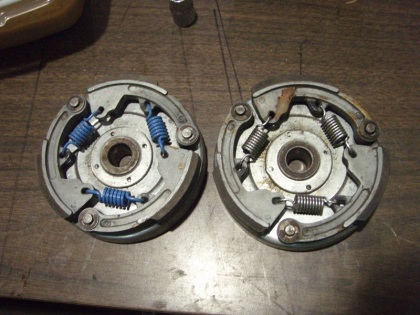
i always figured stock springs would be good enough, the clutch needs to engage much much sooner on my bike than even a stock hobbit would need it to, so the stock springs should work as performance springs in this situation.
i did the swap late in the day and haven’t had a chance to try out the lighter springs, hopefully tomorrow!
lots of people at motomatic this week gettin bikes all tuned up. we have a pretty good ride out to colusa on friday where we’ll be campin and tubin till sunday! exciting! but it doesn’t leave much time for bb unfortunately.
not to worry, though.. with the next race next weekend, i’ll be getting on it real soon.
also, westseattle ryan is sending me down a sweet care package from seattle since he couldn’t make it for camping, and in that care package will be his gopro hd digital video camera! that means lots o rad ride-along footage next race and beyond! so stoked!
mike finally found the time to finish getting the footage from may’s race online!
it’s got me super stoked for the next race! now that i have the variators starting at the bottom of their range i should have sooo much more low end and top speed! finally gunna give those derbies a run for their money! well, assuming i can get comfortable on the bike.. you can kinda tell in that video that i’m not super confident in the corners on it just yet, not like i was on the ciao.. but every lap gets better!
anyway, here’s some pictures. this is the ‘after’ of my gila head after we lathed it. i’m not sure what we did wrong, we either forgot to account for the head gasket thickness i used when taking the squish sample or something, cos my squish is .5mm higher than i wanted.. which was 1mm. so it looks like i’ll be running a head gasket anyway until we get around to fixing it again. at least the squish is the right taper for the piston now, and the piston won’t hit the head!


the modified head on the left vs a stock puch gila head on the right.
and here’s a side by side of a stock hobbit clutch bell/pulley vs the one we turned out. stock pulley cheek is 15deg, the new cheek is 12.5.
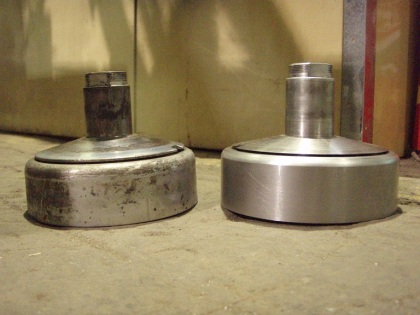

as i said before, tony also lathed 1mm off the clutch bell itself to save weight.


i’d say we cut a fair amount of weight off the thing!
i also took the opportunity to check out the clutch.
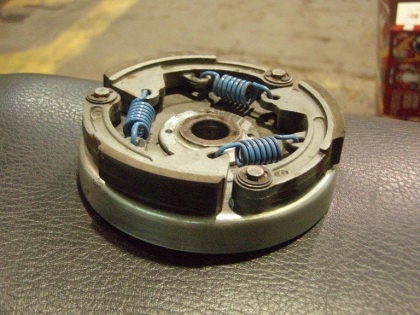
all three pads have even wear all across the clutch surface, so that’s awesome! they were pretty glazed, though, so i sanded them down. i figure i’ll probably be sanding them after every race or so.. if i could get my hands on an electric impact gun i’d be sanding them between heats! having a fresh surface on the clutch makes the hugest difference ever!
the only thing holding me back from riding it around the shop right now is not having a head gasket for it. once i can get my hands on one, i’ll have it back together and i’ll take some videos of it in action! excited? you are, huh!
oh, and i ran my throttle cable and got the carb back on there as it belongs. every time i take a picture of that area on the bike, the picture ends up being way confusing to look at.. hope you can tell what’s going on ok..

well, that’s it for today. more later!
ps, if this blog keeps looking all weird all of a sudden, it’s cos i’m trying out new themes. seems like every moped wordpress blog has the same theme and i wanna find something different, EXCEPT ALL WORDPRESS THEMES SUCK ASS! frustrating.
got to tony’s tonight and got the head and clutch bell done! i even got a couple pics of the action! not as many as i would have liked, but that’s usually the case, isn’t it?
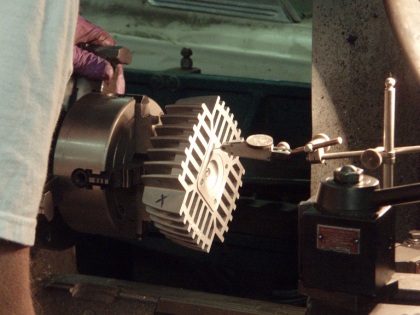
the thing about lathe work is that it takes FOREVER to set up the part, and the cut usually only takes a couple minutes. the head took probably 45 min to get it perfect, which isn’t much time at all (the jack shaft took a couple hours), and maybe 10 min to make all the cuts.
i didn’t get any pictures of the actual lathing on the head, sorry about that.

if you’ll remember, i needed to take down the pulley cheek on the hobbit clutch bell to accommodate the wider belt. while we were at it, we changed the taper to 12.5 deg (stock was 15, i think) to push the belt up higher and to better match the derbi variator i’m using. but before even starting on that, tony skimmed 1mm off the outside of the clutch bell to lighten it up some. it also made the bell more round, which should cut back on vibration.
after doing that, he did the work to the pulley cheek.

tomorrow i’ll get some ‘after’ pictures of the head and clutch bell so that you guys can see what we did. the lighting’s not so good in tony’s shop so i didn’t do it tonight.
the bike should be back together tomorrow if i can find the time, so hopefully more videos of it in action sooooon! with full variation on both variators now, it should make for some impressive videos! i hope! we’ll see!
so one thing that i hated about my bike on the track was how soft the suspension was in the rear. these sebac shocks are great for your more typical setup, but my weird subframe thing totally makes them a couple pogo sticks.
the proper fix is a pair of shocks with a higher spring rate, but after looking around the shop a while, the only pair i could come up with are these long, ugly chrome jobs.
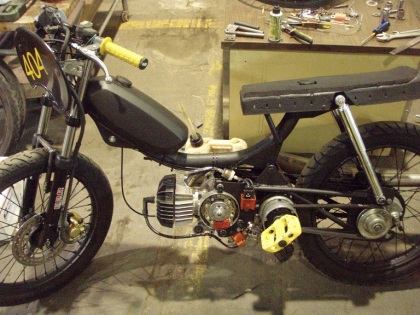

these shocks are scary, too.. they are just some shock ends that thread into the tubes, really weird, kind of hard to explain. and they are longer by like 50mm, which is kind of a bummer. BUT, they are stiffer than my old ones, for sure, and it’s a race bike. function over fashion. so i’m taking these shocks with me to the races, just in case my other idea doesn’t work out.
which brings me to my other idea. you know those useless rubber fin inserts that come with gila kits? no? oh. well click here and look all the way to the right. little weird rubber strips with rubber things hanging off. apparently you stuff them in your fins to keep engine nose down, except these don’t really fit in a gila at all..
anyway, rook had the ones from his kit, so i stole them and cut them up and hammered them into the springs on my sebacs. the end result being a stiffer ride thanks to my improvised spring boosters!
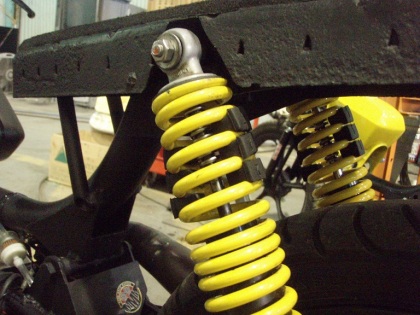
they are doing their jobs well, i just hope i have enough of them in there. eventually i’ll get some shocks that work like they are supposed that aren’t just chrome pipes with a spring in them!
anyway, i also leveled up my clutch springs. tony gave me a selection of springs, i threw in the lightest of them and my bike is loving them! my launch is pretty nuts right now!

blues being performance springs, others being stock, obviously. was it obvious? i dunno.
here is the box they came out of.
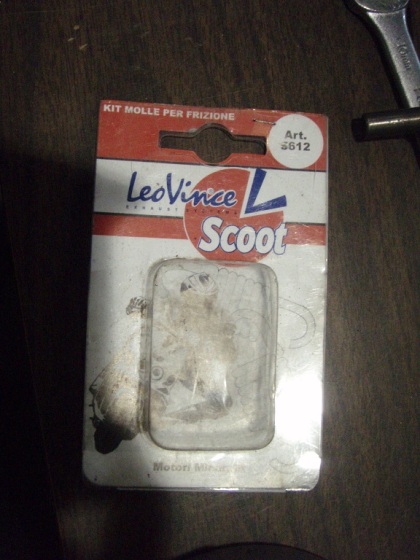
tony gave me some even tighter ones still, but i don’t think i’ll need them. probably.
all the performance goodies in the world won’t be worth a damn if you can’t start your bike. SO FRUSTRATING! the hobbit starting clutch is a piece of junk, and nothing i could do would make it work better. name something, i probably tried it. having the jack shaft thing is awesome for gearing while riding, but a bitch when trying to pedal or push start.. so me and nate came up with the best idea ever! well, it’s a clever quick fix that will work awesome at the track until i can find a better way to start this mother.
you know how doppler variators have that long nut to hold it on? no? oh. well, they do. and only like a third of the nut is actually on the crank shaft, so you’re left with a nice threaded hole at the end of your crank shaft. if you try to drill start a bike on that nut, once the motor fires and takes off, it spins faster than the drill can go and spins the nut off. also frustrating.
so we took an 11mm wheel axle (same size and thread pitch as the vario side of a moby crank) and threaded it into the nut till it bottomed out on the crank, put an axle nut on the axle so that it sits like 1mm from the variator nut, cut the axle off behind that nut and welded the nut and axle chunk together, making this custom bolt;
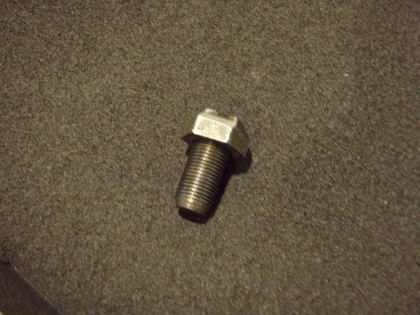
it looks like this when threaded into the motor;
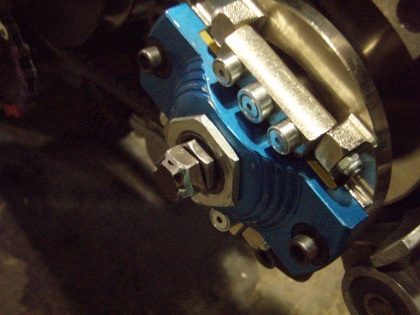
we use that to drill start the motor. the drill is trying to screw the bolt in as it’s starting, but the bolt is bottomed out on the nut. the motor turns over, fires, and the crank spinning faster than the drill backs the bolt out real quick till it falls on the floor. tada!
sorry if that’s all real confusing.. i meant to take a video of it in action, but totally spaced it. i’ll get one sometime this weekend to show all you kiddos.
anyway, that’s what i got. the bike is ripping awesomely again, though i have more on-track tuning to do. hopefully no one runs me off the track and makes me high side into them again and then demands i buy them a new derbi seat BECAUSE I WON’T, YOU JERK!
see you at the races! or not!